Surely we have all fantasized about the idea of talking with our favorite anime characters, and the best thing is that now we can do it thanks to AI. And it’s not about talking to ChatGPT and asking him to play Kira or Asuka – although you can do it too. We are talking about a new AI platform called Seaart Ai, which has multiple integrated AI tools to make your dreams come true more easily.
If you want to develop your own anime character and bring it to life, then pay attention to this tutorial and you will see how simple it is to do it!

Create your account on SEAART AI
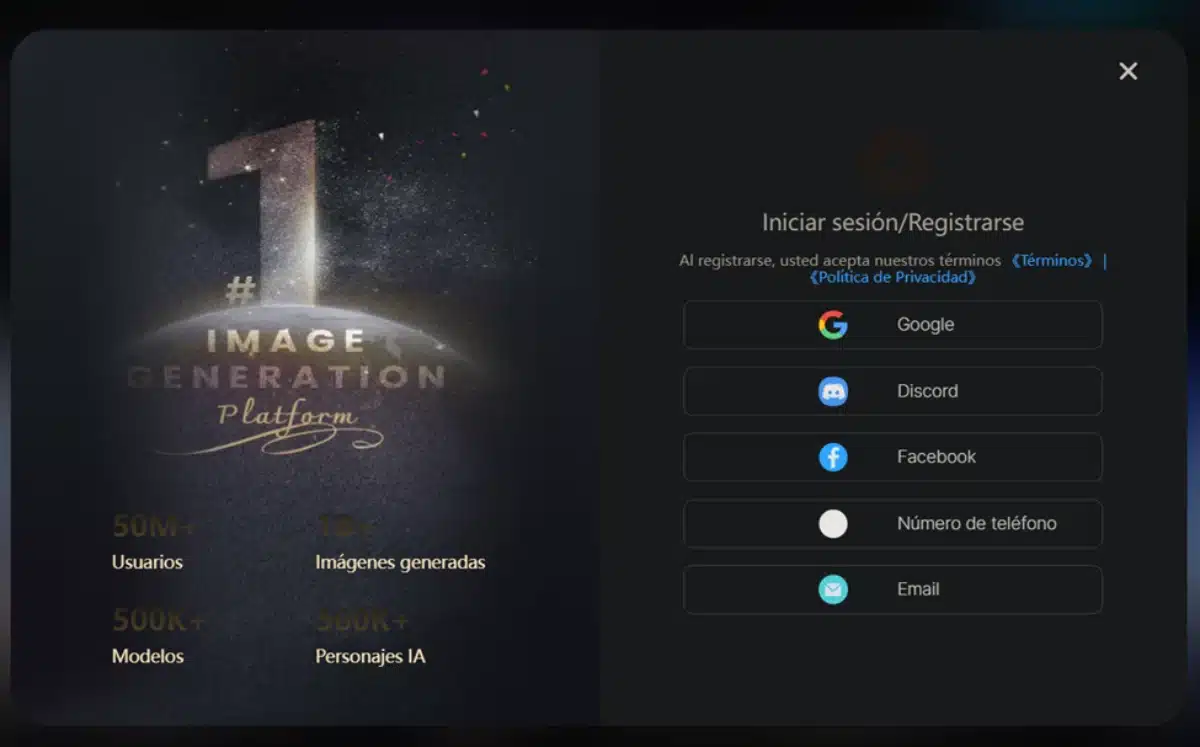
The first thing you need to create your IA character is to create an account with SeaArt AI, the gamified AI platform that has all the tools you need for the job. Then go to their website –www.seaart.ai/es– and click on the button in the upper right corner to create your account. You have several methods, for example by linking your Discord, Google or Facebook account.
Design the avatar of your AI
When you have accessed the platform you will see that you have the ‘Create’ menu at the top of the screen. This is where you will find all the tools you need to Create anime with AI, but don’t throw yourself into the character’s in-depth creation yet. Although you can do it, it will be more practical to start with the design of its appearance. You can do this in with the ‘Create Image’ tool that tops the menu.
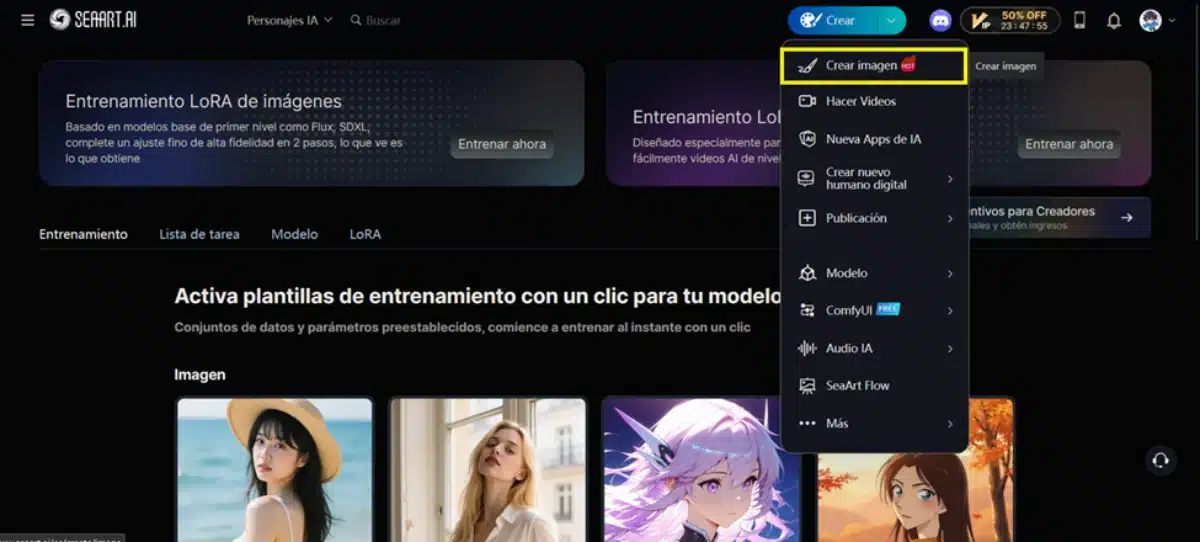
By pressing it you will access the SeaArt AI image creator, which is not only to create anime images, but can be used for much more. What concerns us is creating an anime character, however, so let’s choose the right options for that.
1. Choose the AI model
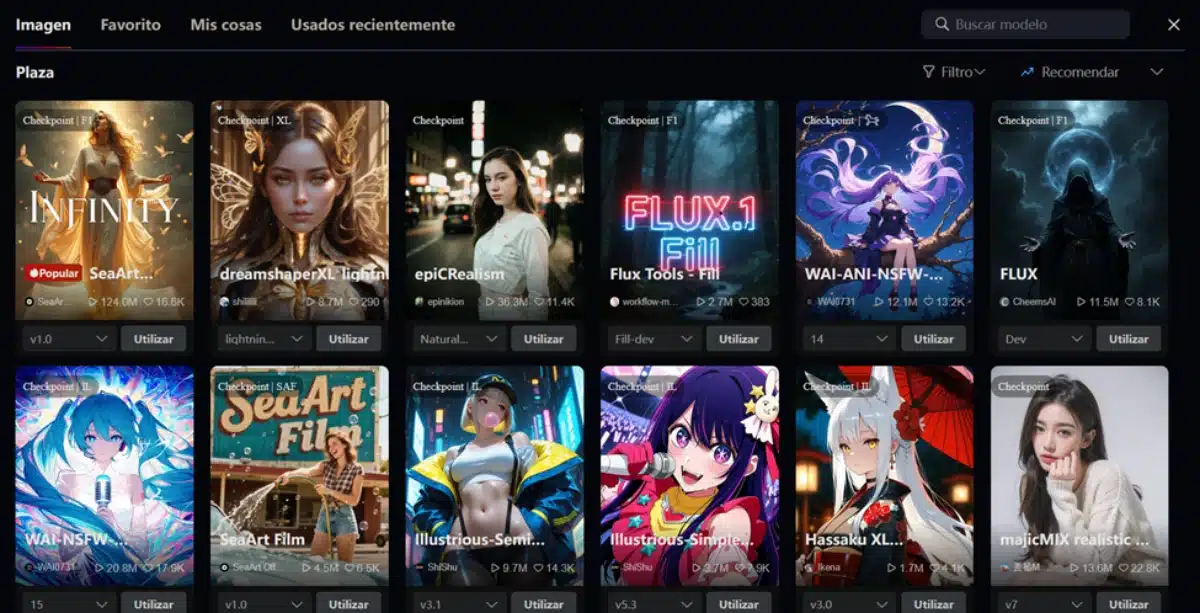
At the top of the Advanced Options menu, choose the AI model you want to create your character. By clicking on that menu you will have access to dozens of different models that will determine the style of the generated image.
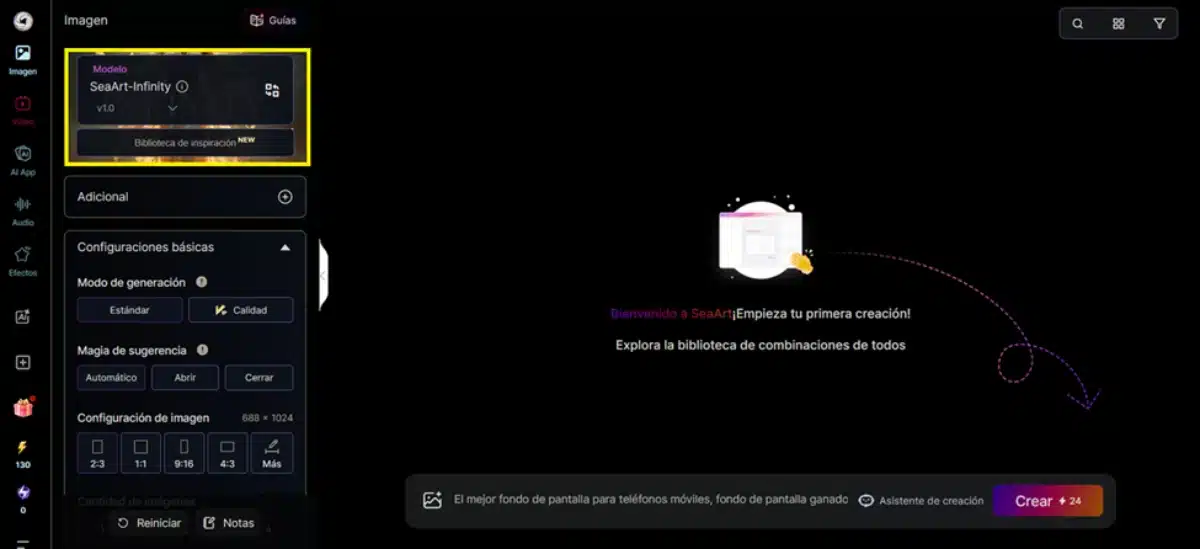
Browse the available models or search for a specific one using the search bar at the top right. When you have the one you need, press the ‘Apply’ button.
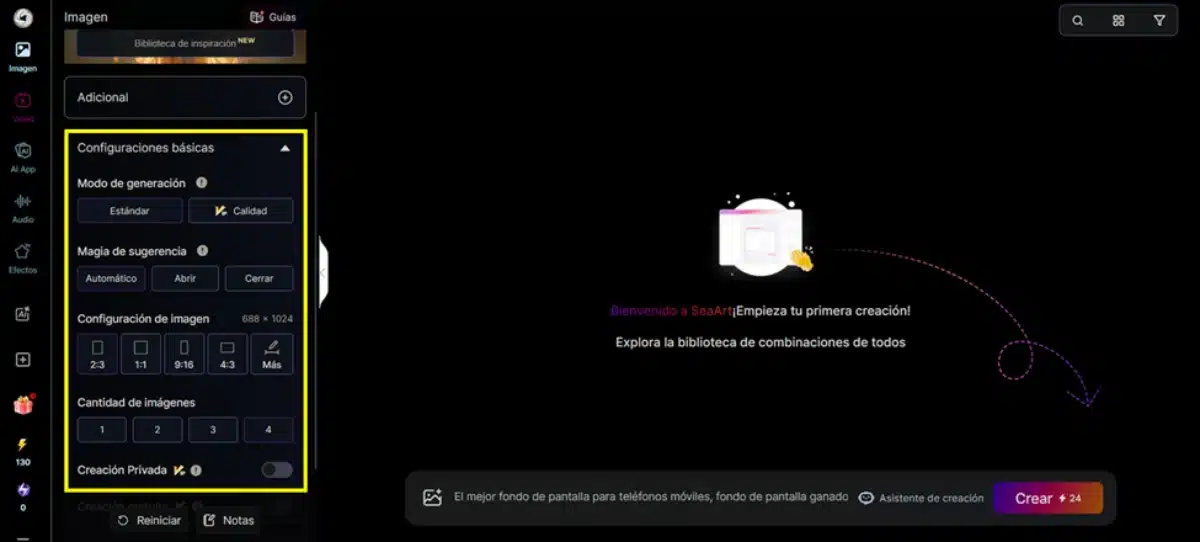
2. Adjust advanced parameters
After choosing the model, choose the advanced parameters suitable for the avatar. A 2:3 image may be ideal. In the advanced options below, determine the sampling steps you want to use, and the CFG scale you want to apply to your prompt’s interpretation.
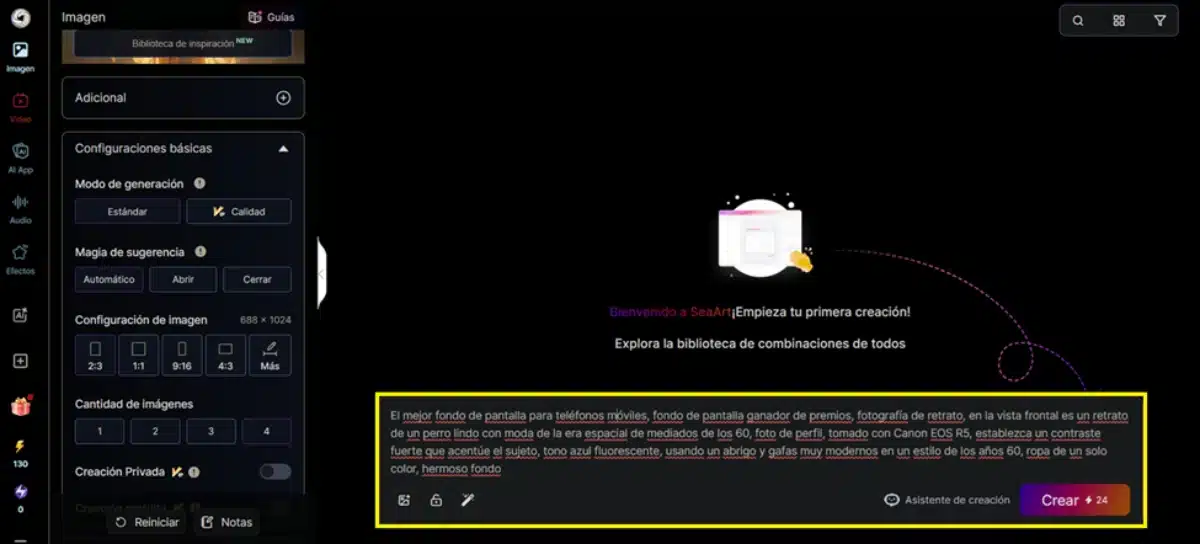
3. Describe the image
When you have set all the parameters, it’s time to work on the prompt. Enter it in the lower center form, and describe in detail how you want your character to be. You can use all kinds of terms, from the description of the hair or face to its character or its posture. The AI will be responsible for creating an image from your prompt, following the parameters set before.
4. Keep trying until you find the right image
It is unlikely that you get the image you were looking for from the first moment, so keep testing until you get it. Modify your prompt and parameters as many times as necessary until you find a character that fits your expectations. Do you already have it? Great! then save it and let’s go to Free IA Anime Builder.
An alternative: upload your photo and make it an anime character
The steps we have just seen are to create an anime character from your imagination. However, if you just want to turn your own traits into an anime character, you can do it more quickly with a specific tool that SeaArt puts at your disposal. This is the IA anime filter, which is more social-oriented, but you can also use it for this.
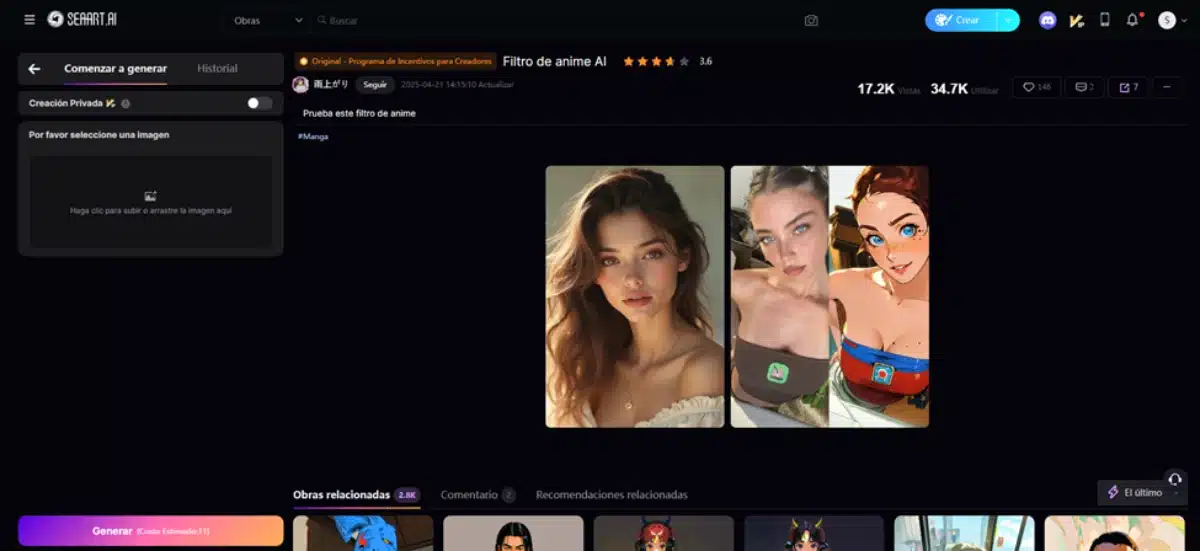
To Convert photo to anime, just upload your photo – or the photo of the person you want – on the left side of the screen.
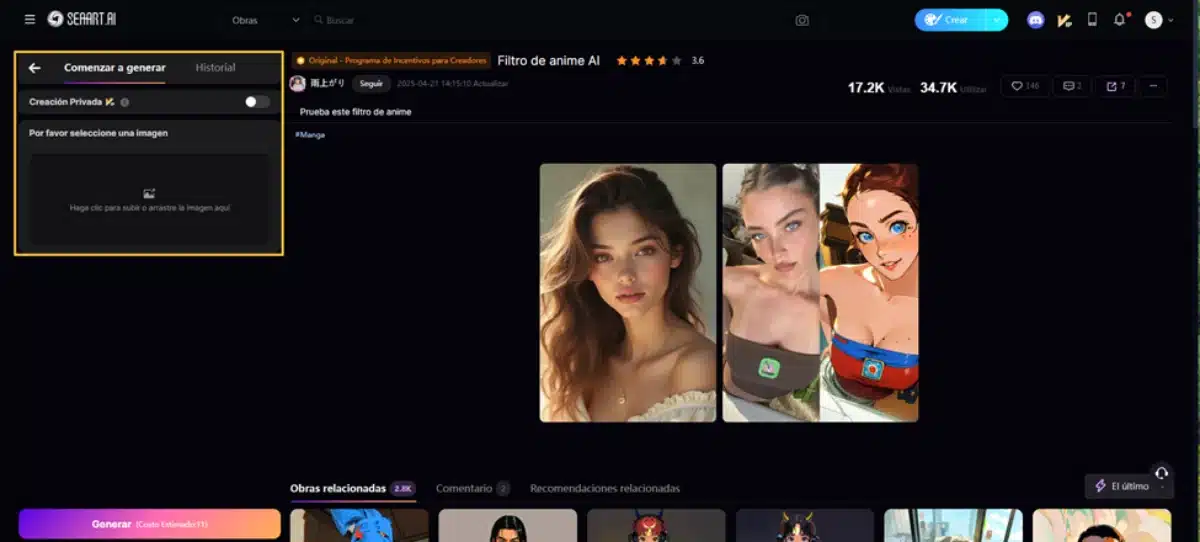
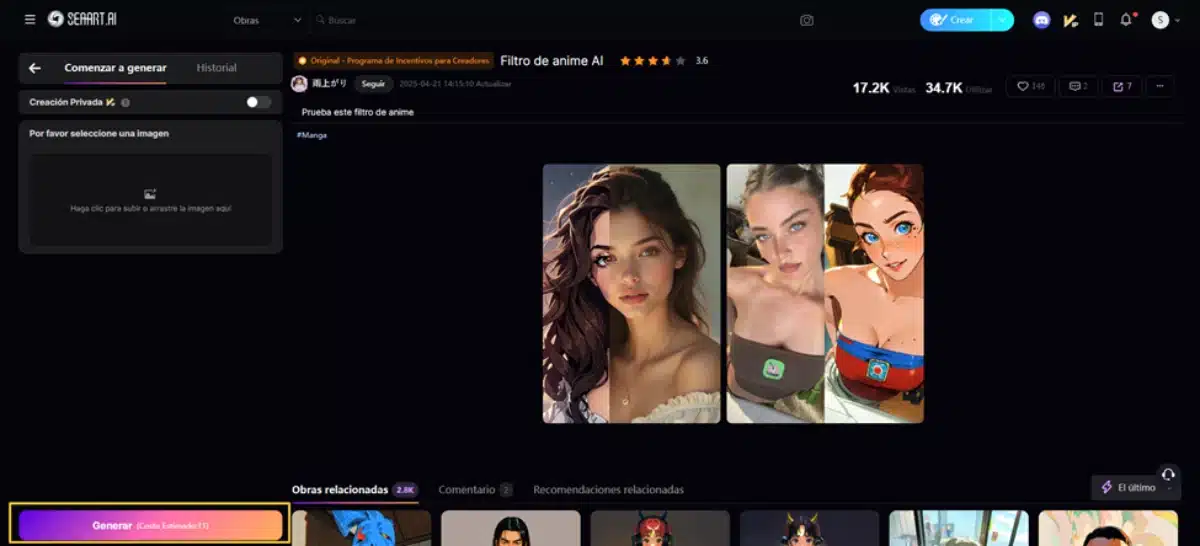
And then press the ‘Generate’ button which you will see below. Then you will have your photo converted to an anime character in seconds.
Develop your anime character
Now comes the good. When you already have the photo of your anime character ready – with any of the methods we just saw – go to the ‘Anime Character Creation’ tool to create yours. You can choose between the ‘Expert’ or ‘Self-Generation’ mode.
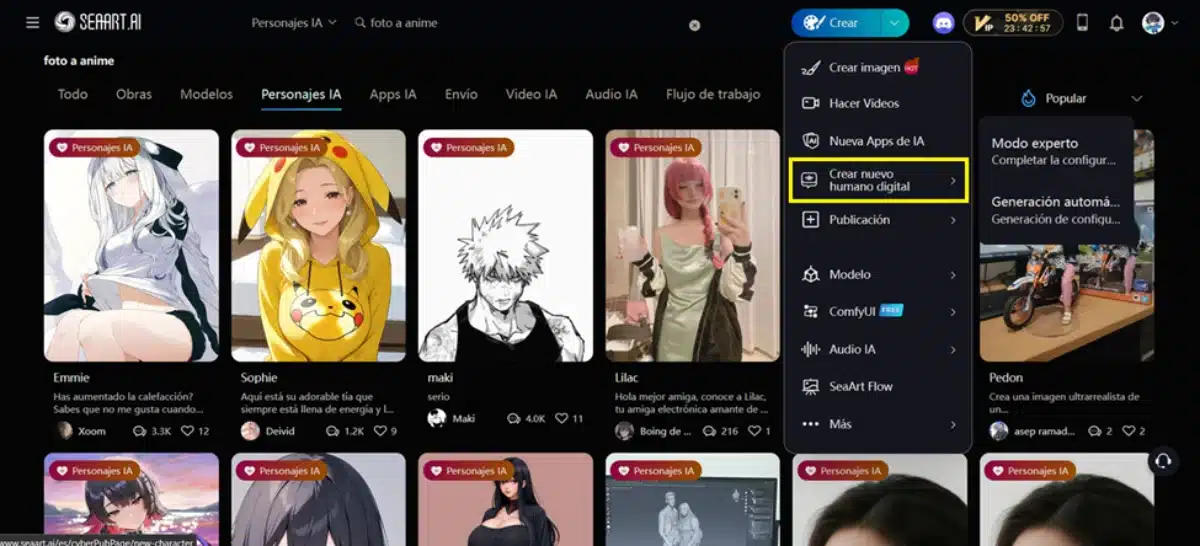
1. Load the image
As you can see, the first thing that the anime character generator asks of us is to load the image of the character in question. That’s why it was the first thing we did. You can upload it by dragging the generated image to the box you will see at the beginning of the form.

2. Describe your character
Add your character summary so that the AI can use it as a reference to generate its character. You only have 3500 characters, so make them count. Make sure you fill out this full box with a summary that covers your personality and your background.
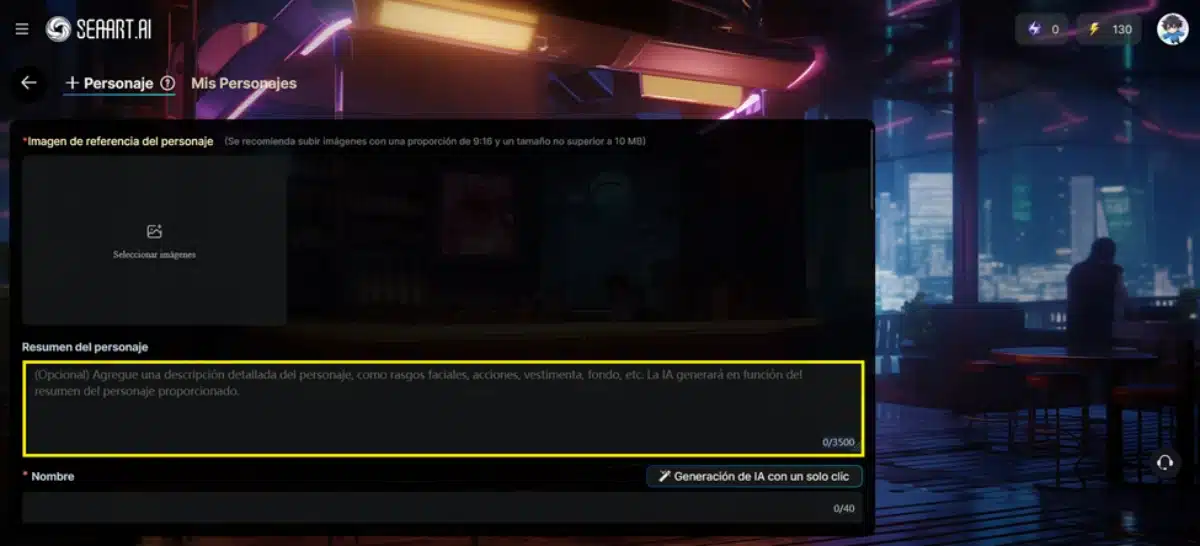
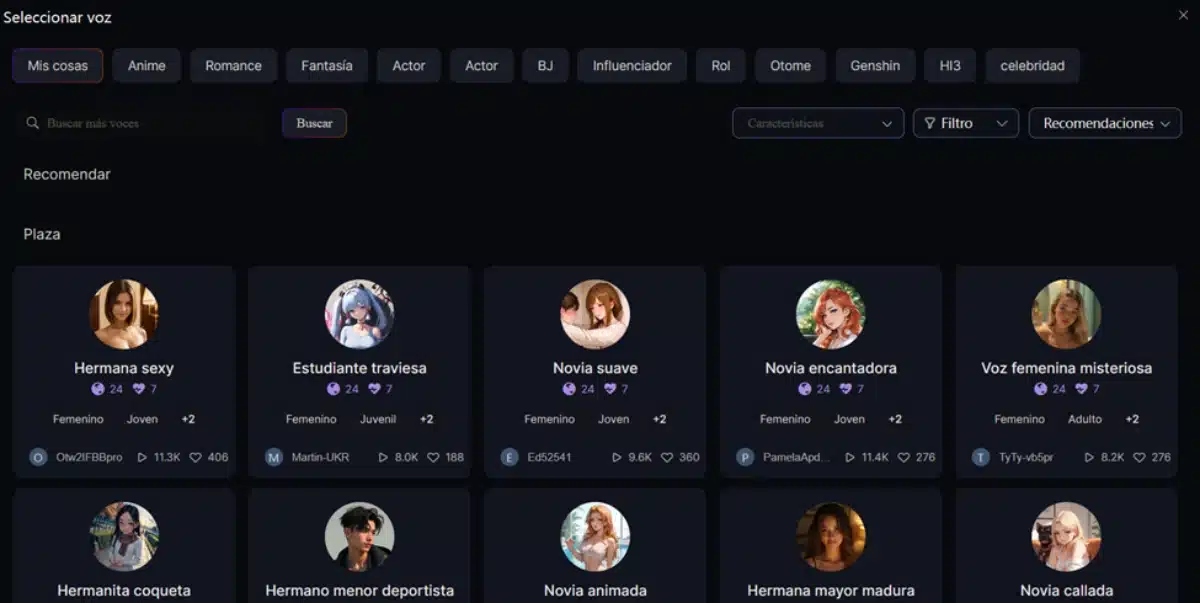
3. Give it name, gender and voice
Your character doesn’t have a name yet –although maybe it does have it in your head–, so it’s time to give him one. Choose a name that fits you well, and also give it a genre and a voice.

When choosing the voice, you have a wide variety of models to choose from. The simplest option is to choose one of these models, but you can also create your own. However, that is much more advanced and should be explained in another tutorial.
4. Write the first message and the evaluation
The next thing you should do is write the character’s initial message to users. This is very important because it consists of your cover letter. You must also write the evaluation of the character, which works as an introduction to his page, but which is not used for the AI to give him his personality.
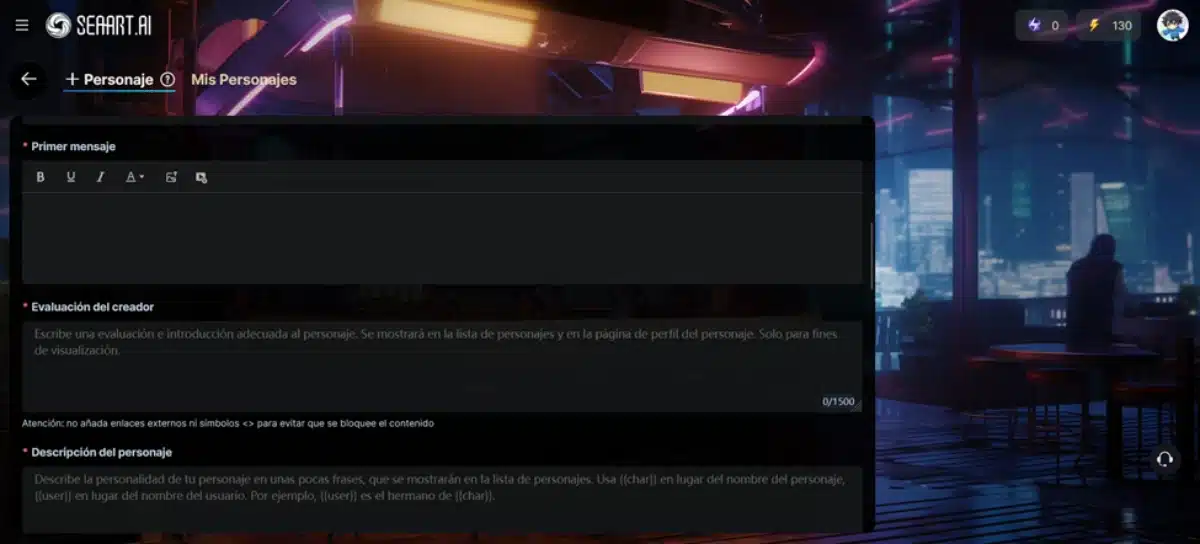
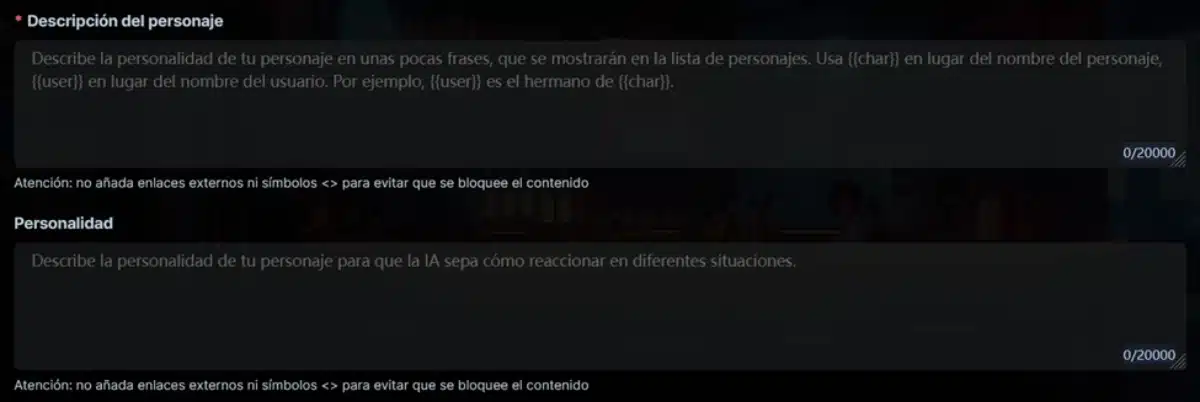
5. Build the character description and personality
The following two sections are critical for your anime character’s personality, and therefore you have a limit of 20,000 characters for each. In both it is important that you develop your personality, but the description is more contextual – its history, its role in the world, who it is – while the second is more psychological and emotional: how it thinks, how it reacts, what it feels. Explain yourself and make sure you create a character with a memorable mind and emotions!
6. Set the permissions
Finally, you will have to determine what permissions your character has, that is, if it will be available to the public or if you want it to be private and only for you. Especially if you make it public it is important that you assign categories that correspond to it, so that it is easier to locate by other users.
7. Advanced Options
Finally you have the advanced options, which are not really too complex: they simply delve into the details. The most relevant is the chat mode, where you can choose if you want the character to express itself as a normal chat or if you prefer to make it more delicate, more intimate, or completely ‘freestyle’. You also have a more narrative mode.
The other two options – ‘Scenario’ and ‘Example of Dialogue’ are simply to complete a little more the context of the character. The scenario defines where the character is now, in contrast to its more general historical context. And, if you want, you can also create an example of dialogue so that the AI has more references about how the character should be expressed.
Do you want to perfect your AI character even more? Chat with him
Seaart gives you more than plenty of options to create an extraordinarily detailed anime character, but that’s just the beginning. As is often the case with AI, your first attempt will not necessarily be the best. The trial and error method will give you better results, so take advantage to chat with your character to see what you can improve it.
Pay attention to the following:
- the excesses. Is your character too sarcastic, dry, honeyed or anything else? An excess of character in a specific trait clearly points to a bad prompt. Go taking note of your character’s excesses, and then locate in the prompts what the cause may have been. Adjust it accordingly and try again.
- the shortcomings. The reverse can also happen. Does your character lack strength, decision, plasticity or romantic appetite? Check the prompt to see if you actually gave them or not. If there is something missing, adjust the text of the prompt so that your character can incorporate it into your way of being.
- the distinction. Your character may not be over or missing anything, but it turns out too much… ‘flat’. If your character is sounding more like a generic AI model than a self-identity, it’s just that you still have a lot of work to do. Tune up those Prompts better, and don’t worry! The first one is not always right.
Immerse yourself in your anime fantasies like never before with SeaArt Ai
The best thing about SeaArt AI is that it has all the tools you need to unleash your imagination and create your anime fantasies as you had always dreamed of. You can create the look and personality of your anime character without leaving the platform, and if you want, you can also share it with the world for other people to enjoy. What a few years ago was unthinkable, now you have it at your fingertips with only a few text prompts!
Don’t miss this opportunity and start discovering everything that SeaArt AI has to offer you. In addition to anime character and image creation, this platform also allows you to create AI videos, AI voices, and much more. In addition, it is a gamified and social AI platform designed to share your creations and inspire you with those of others. Do you think you are capable of creating an anime character that leads the Seaart Ai rankings? Sign up now and find out!